
Under Frontstage content in the Backstage, you build every page of your public website yourself — no code, no developer.
Your website is made up of pages (Home, The Band, Media, Contact, and any custom page you add). Every page is, in turn, built from an ordered list of sections — the actual building blocks: a block of text, a photo gallery, an agenda, a contact form, and so on. Add as many sections as you like, in whatever order makes sense, mixing and matching types freely.
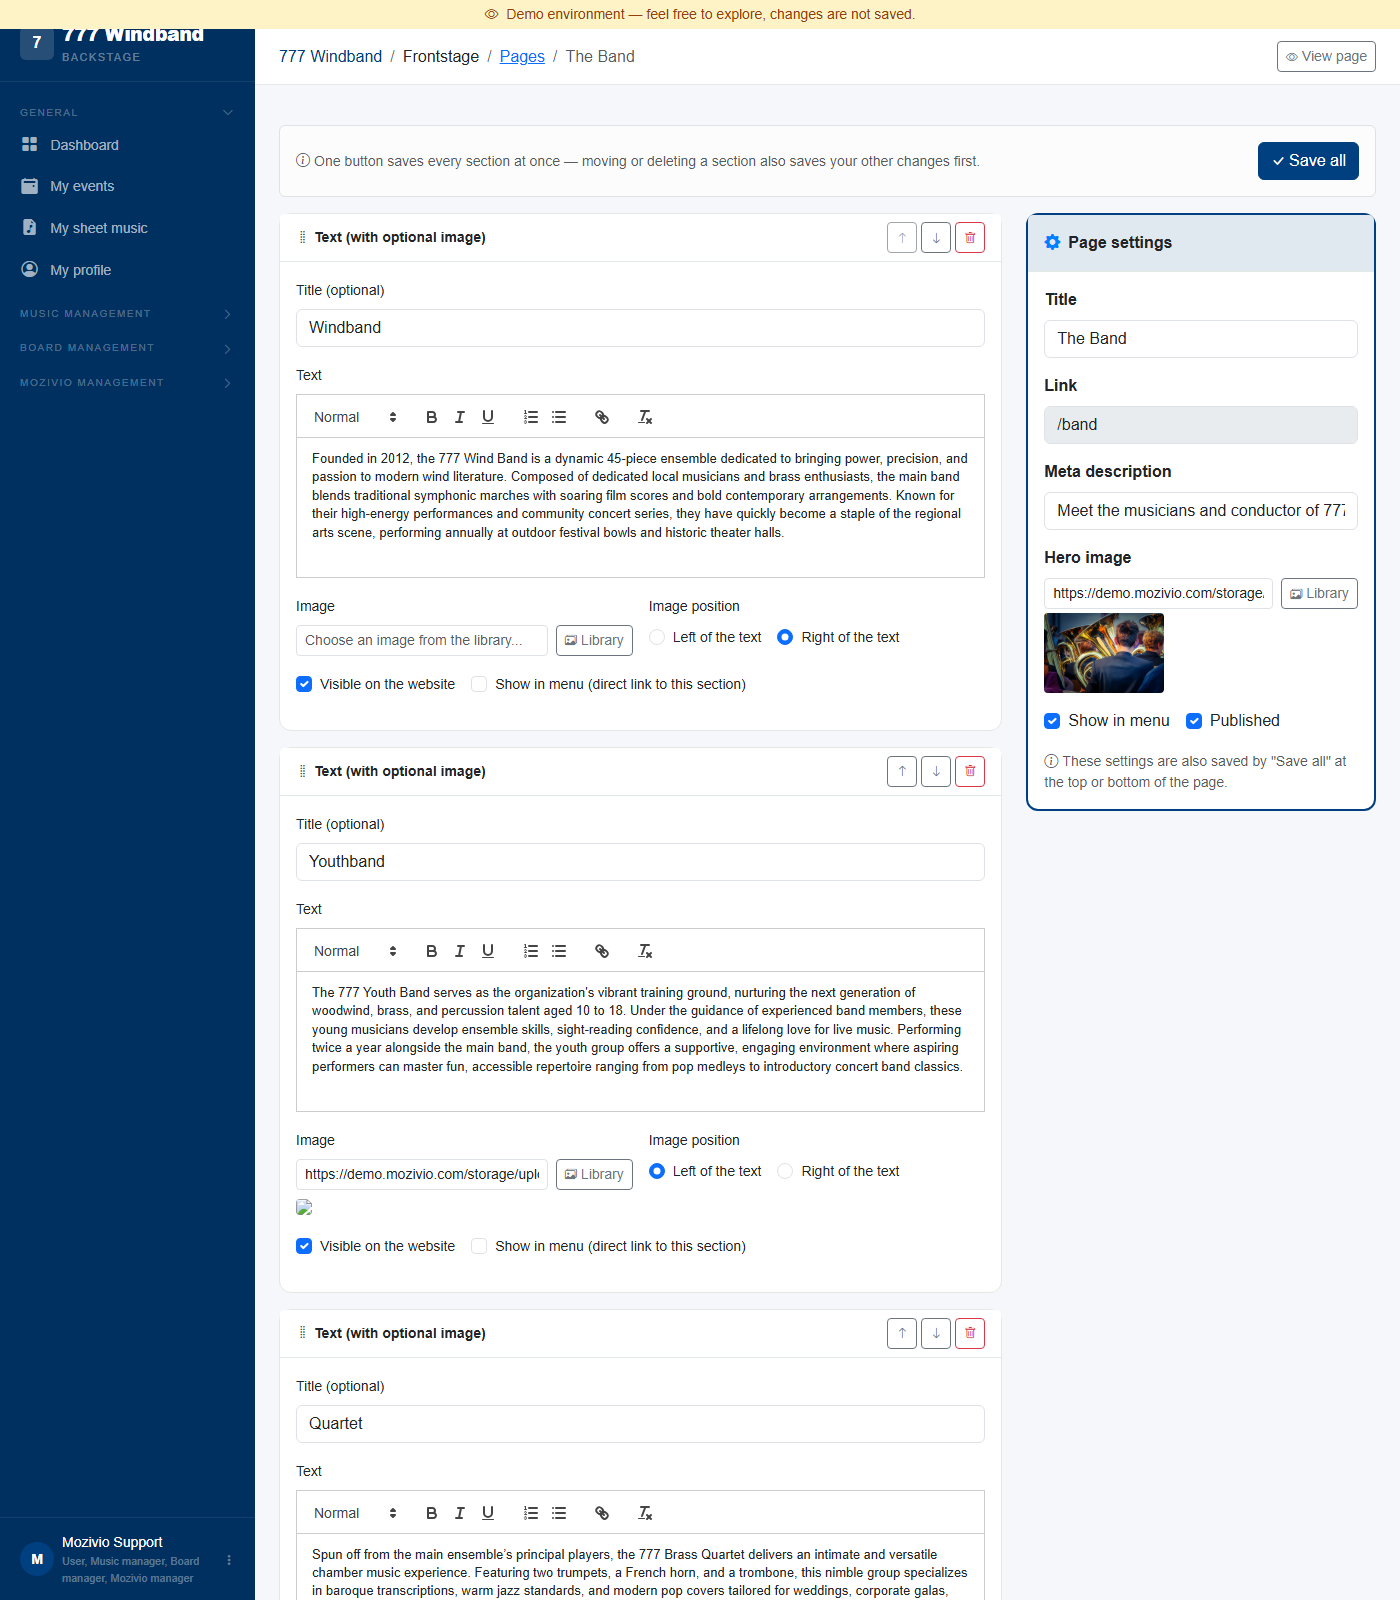
Open a page and its settings appear in the panel on the right:
/band). Set automatically from the title when you create the page.Your Home page is the one exception: it can't be deleted or unpublished, and always stays in the menu — every other page (including the ones you started with, like Band or Media) can be freely renamed, hidden, or deleted.
Adding a page to the menu is simply a matter of ticking "Show in menu" and making sure "Published" is on. Reordering the menu is done from the Pages overview (the list you land on before opening a page, not the page editor itself): grab a page by its handle and drag it up or down the list — the new order is saved immediately and reflected in your site's menu right away. Home always stays the first item in the menu and isn't part of that draggable list — every other page can be freely reordered around it.
Only pages can appear as a top-level item in your site's menu (controlled by that page's own "Show in menu" setting above). A section can never get its own top-level menu item — instead, a section can be added as a submenu item that appears nested under its own page's menu entry, linking straight to that section further down the same page. That's what the "Add section as submenu" toggle (covered next) does.
One "Save all" button (top and bottom of the page) saves everything at once: the page settings on the right, and every section's content on the left, in a single click. Moving a section up/down or deleting one also saves any other pending changes first, so nothing you typed gets lost by clicking a different button. There's no separate "preview" or draft mode — once you save and the page is Published, the change is immediately live. Use the "View page" button (top right) to open the real, live page in a new tab and check it.
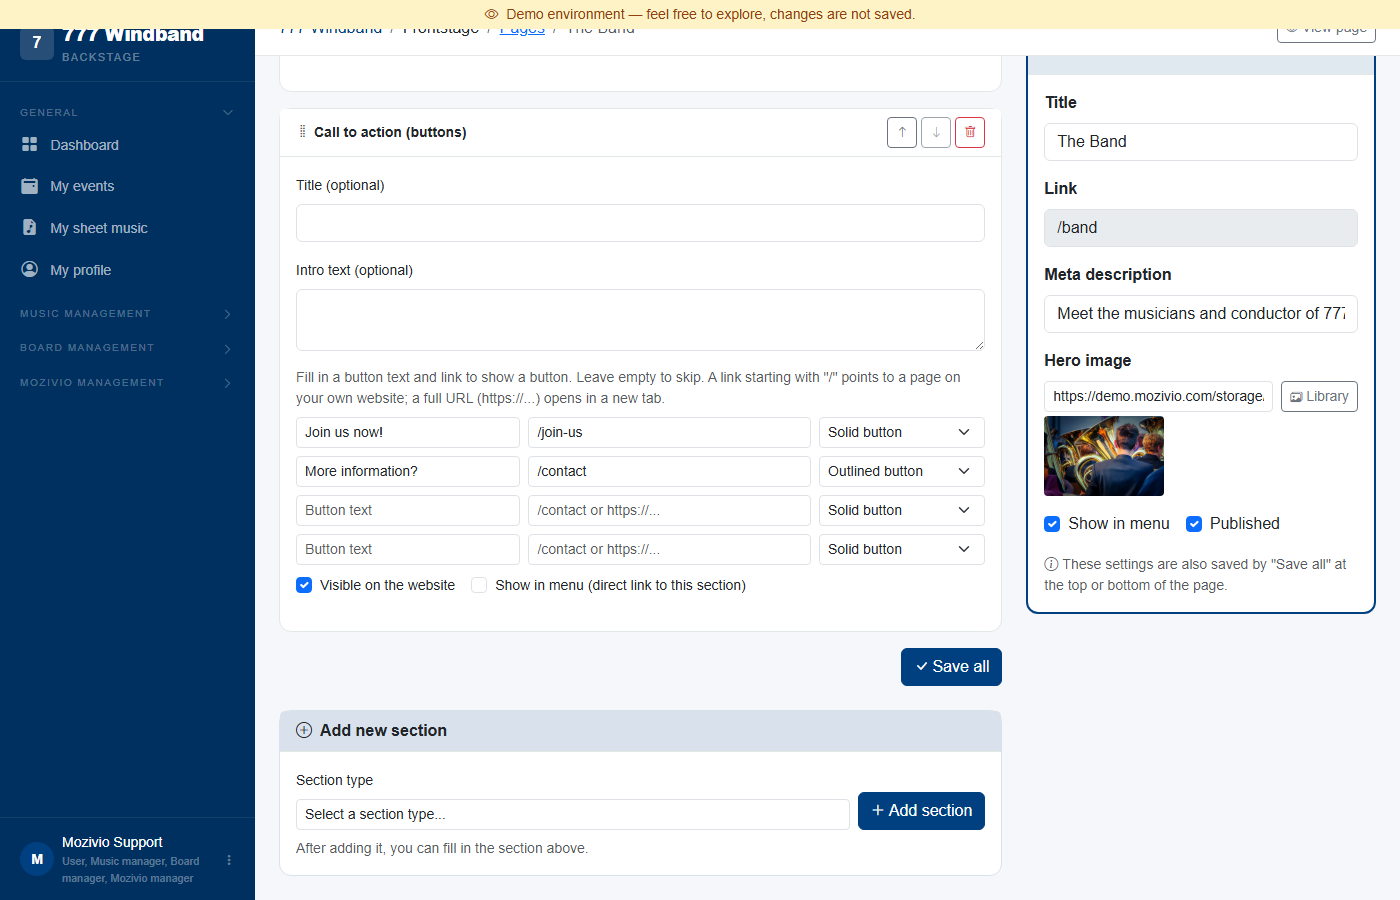
At the bottom of the page, pick a type from the "Add new section" dropdown and click "Add section" — it's added at the end, ready for you to fill in above. Reorder any section with the up/down arrows next to its title, or remove it with the trash icon.
Every section shares two toggles: Visible on the website (show or temporarily hide it without deleting it), and Add section as submenu — when enabled, that section gets its own link nested under its page's menu entry (handy for jumping straight to, say, a "Join us" form further down the homepage). See "Menu items vs. submenu items" above for how this differs from a page's own "Show in menu" setting.
/ points to a page on your own site; a full https:// link opens in a new tab.